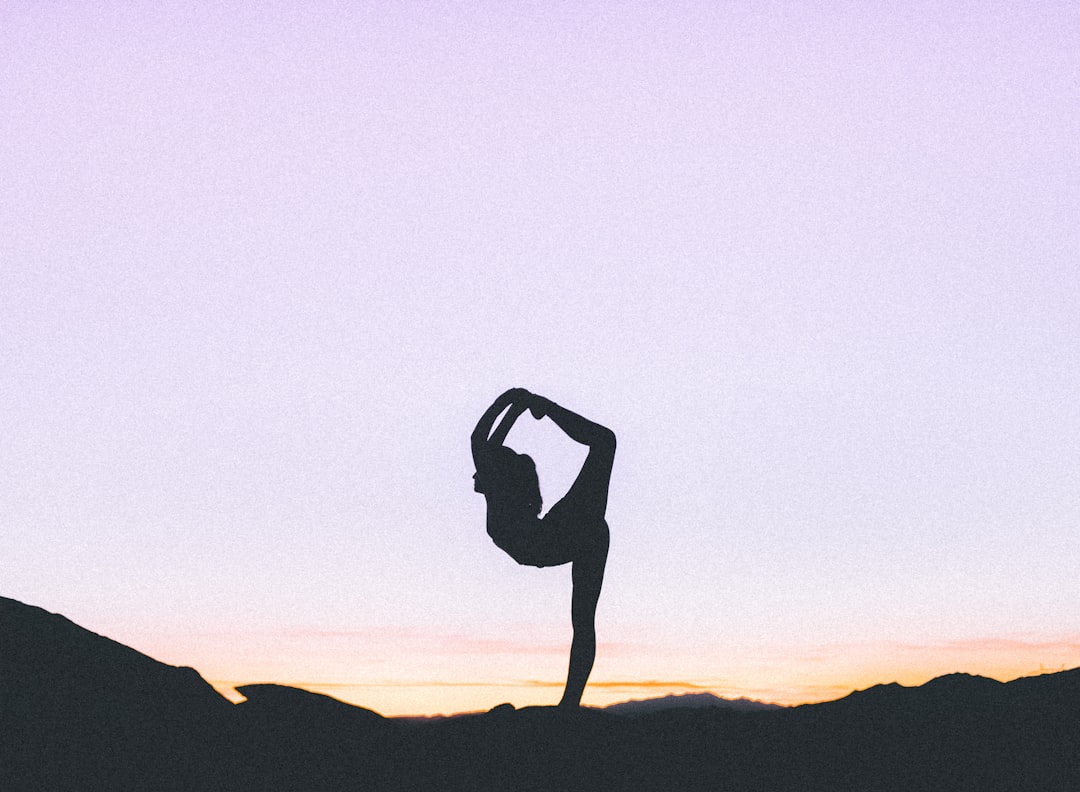
Modify Any Pose: A Practical Guide to Safe Yoga Pose Modifications
A practical, trusted guide to yoga pose modifications, props, and safe cues for injuries, aging bodies, and limited mobility.
Modify Any Pose: A Practical Guide to Safe Yoga Pose Modifications
Yoga pose modifications are not a backup plan or a lesser version of practice. They are the skill that makes yoga usable across real bodies, real schedules, and real-life limitations. Whether you are working with a sensitive back, recovering from an injury, supporting an older adult, or teaching a beginner who feels overwhelmed, the goal is the same: keep the benefits while reducing unnecessary strain. If you are building a sustainable practice, it helps to think of modifications the way you would think of choosing the right tool for a job, as we discuss in our guide to setting up the right system for changing conditions and in this practical piece on evolving with features as needs change.
This guide is designed to be a trusted-advisor toolkit. You will learn the principles behind safe scaling, how to choose props for modification, how to cue alignment without creating fear, and how to adapt common yoga poses for chairs, walls, blocks, straps, and cushions. You will also see how yoga can remain accessible during flare-ups, aging, pregnancy, fatigue, and mobility restrictions. For readers who want a broader wellness framework, it pairs well with our article on ergonomic upgrades for people managing long hours at a desk and choosing environments that support safer daily routines.
Why yoga pose modifications matter
Yoga should meet the body, not punish it
Many people assume flexibility is the entry ticket to yoga, but the deeper truth is the opposite: yoga is a method for working with the body you have today. Modifications help preserve breath, joint integrity, and confidence, especially when a pose otherwise demands more range of motion than a person can safely access. A well-modified pose still trains attention, strength, balance, and mobility, but it does so with much less risk of compensation patterns like collapsing the chest, gripping the neck, or locking the knees. This is why injury-friendly cues and alignment adjustments matter just as much as the pose itself.
Accessibility supports consistency
When a pose feels impossible, many people quit before the benefits have time to accumulate. Modifications reduce that friction, which is especially important for beginners and busy professionals who need a shorter, more achievable practice. Consistency is often more valuable than intensity, and a 10-minute chair yoga sequence done four times a week can outperform an ambitious routine that is abandoned after two sessions. That same logic appears in planning guides like automating routines to make healthy habits easier to repeat and building resilience through small, repeatable steps.
Modifications are not one-size-fits-all
Two people may need different versions of the same pose for entirely different reasons. One person may want to reduce pressure on the wrists, while another may need more stability because of balance concerns or a healing knee. That is why the best approach is principle-based rather than rule-based: first assess the joint demands, load, and balance requirements, then reduce or redistribute them. This mirrors the careful decision-making used in designing flexible systems with rigid requirements, only here the system is the human body and the goal is safe movement.
The 5-step modification framework
Step 1: Identify the pose’s main demand
Before changing a pose, ask what the posture is really asking of the body. Is it demanding shoulder opening, hamstring length, wrist extension, spinal flexion, core engagement, single-leg balance, or load-bearing through the arms? When you identify the primary challenge, you can modify precisely instead of guessing. For example, downward dog may look like a hamstring stretch, but for many people the real issue is wrist load or shoulder compression, which means the right change may be elevating the hands or shortening the stance rather than simply “bending the knees more.”
Step 2: Reduce the range or the load
Every pose can generally be made easier by lowering the depth, the leverage, or the amount of body weight involved. Less depth means less demand on flexibility, while less leverage often means less strain on joints and connective tissue. In standing poses, widening the stance or using a wall can instantly increase stability. In floor poses, placing a folded blanket under the hips, back, or knees can reduce stress. For practical shopping logic around choosing the right support tools, see our piece on building your own accessory bundles and choosing helpful tools that pay for themselves through repeated use.
Step 3: Preserve the shape, not the ego version
A modification should keep the functional intent of the pose whenever possible. If a backbend is too deep, keep the chest open with a supported variation rather than forcing a bigger arc. If a balance pose is too shaky, bring one or both hands to a wall while maintaining the same leg pattern. This principle protects the nervous system because the student still recognizes the pose and gains confidence without a fight-or-flight response. In caregiver settings, this matters even more because clear structure reduces confusion and helps the person feel safe and successful.
Step 4: Use props intentionally
Props are not crutches; they are accuracy tools. Blocks help shorten the distance to the floor, straps extend reach without rounding the spine, blankets cushion joints, bolsters support restorative shapes, and chairs create accessible standing or seated versions of almost any pose. The best prop choice depends on what is being limited: flexibility, balance, strength, endurance, or confidence. You can think of props the way planners think about staging and support in distributed systems—they provide stability where direct force would be inefficient or risky.
Step 5: Reassess after each breath cycle
Modifications should be dynamic, not static. A person may need more support at the start of class and less support later after tissues warm and the nervous system settles. Encourage slow breathing and a simple internal check: can they talk, breathe smoothly, and exit the pose without bracing? If not, scale back. These micro-adjustments are the difference between a practice that builds capacity and a practice that quietly creates overload.
Prop choices: what to use and when
Blocks, straps, and blankets
Blocks are the most versatile modification prop because they reduce reach demands in standing and seated poses. They can support hands in triangle, half moon, lunge, and forward folds, and they can even be placed under the sacrum for supported bridge. Straps are ideal when a student lacks shoulder or hamstring mobility but still wants to keep the pose structure intact. Blankets help under knees, wrists, ankles, hips, and head, making them essential for anyone with sensitive joints or limited padding. A simple setup often works better than an elaborate one, much like choosing the most practical deal instead of the flashiest one.
Walls, chairs, and elevated surfaces
A wall is one of the best props for balance, alignment feedback, and confidence. It can reduce fear in standing poses, help calibrate the pelvis and rib cage, and make transitions safer. Chairs expand access even further by removing the need to sit on the floor and by offering an anchor for standing or folded shapes. Elevated surfaces such as a countertop, sturdy bench, or block stack can bring the floor closer, which is especially useful for older adults or people with back pain. For readers comparing support options the way they compare purchases, our article on budget-friendly alternatives shows how to match the tool to the need rather than the trend.
Bolsters and cushions for restorative support
Bolsters are especially useful for restorative poses, gentle backbends, and supported forward folds because they let the body release effort without collapsing. A cushion or folded blanket can perform a similar role if a bolster is unavailable. The aim is to remove the need to hold yourself up in a shape that is meant to restore. This is one reason restorative and chair-based practices are so valuable for stress reduction and sleep support, especially when paired with the pacing advice in timing your commitments so you are not forced into last-minute strain.
How to modify common yoga poses
Downward dog modifications
If you want to know how to do downward dog modifications safely, start by changing the parts of the pose that create pressure. Place hands on a wall or on the seat of a chair for a standing version if wrists or hamstrings are sensitive. On the mat, keep the knees bent generously and lift the heels if needed so the spine can lengthen without forcing the legs straight. If shoulders feel crowded, widen the hands slightly and rotate the upper arms outward so the neck stays spacious. If the person cannot comfortably bear weight through the wrists, move to forearms on a wall or use fists on blocks, always prioritizing comfort over a perfect silhouette.
Forward fold, plank, and cobra
Forward folds should feel like length, not compression. Bend the knees enough to keep the pelvis tilting forward rather than tucking under, and rest the hands on shins, blocks, or a chair seat if the floor is too far away. For plank, drop the knees to the mat or elevate the hands on a bench to reduce shoulder and core load while preserving the strengthening effect. In cobra, keep the pelvis grounded, place the hands farther forward, and lift only to a low, pain-free height; many bodies do better with baby cobra than with a large backbend. These are classic beginners modifications because they let the student build shape and awareness gradually instead of chasing depth.
Warrior, triangle, and balance poses
Warrior poses can be shortened by bringing the stance closer together, decreasing the bend in the front knee, or placing the back heel against a wall for reassurance. Triangle pose is often more accessible with the bottom hand on a block or on the shin, which keeps the spine long and reduces the urge to collapse into the front leg. Balance poses such as tree can be done with toes on the floor, heel against the ankle, or one hand hovering near a wall. Caregiver-friendly cues like “stand tall through the crown of the head” or “keep the front knee soft” often work better than technical instructions because they are easy to remember under stress.
Bridge, child’s pose, and seated twists
Bridge pose becomes much safer when the feet are hip-width apart and the lift stays modest enough to keep the ribs from flaring. A block under the sacrum turns bridge into a restorative shape and can be a better choice for those with low-back fatigue. Child’s pose should never be forced; a bolster under the chest or thighs, or a wide-knee version, may be kinder for knees, ankles, or the abdomen. Seated twists should come from length first, then rotation, and should stay gentle for anyone with osteoporosis, post-surgical restrictions, or acute spinal pain. The point is not to avoid these poses entirely but to match them to the person’s current capacity.
Chair yoga options for limited mobility and busy days
Chair yoga as a complete practice, not just a fallback
Chair yoga options can provide a full-body practice that includes mobility, breathwork, circulation, posture, and stress relief. A seated practice is often ideal for office workers, caregivers, people recovering from illness, and older adults who want something practical and repeatable. It also helps people transition from “I can’t do yoga” to “I can do the version that works for me,” which is a powerful psychological shift. If your schedule is tight, pair chair yoga with short routines and adaptive planning ideas from routine automation strategies and efficient scaling models.
Simple seated sequence
Start with seated mountain: feet grounded, pelvis neutral, crown lifted, breath steady. Then add shoulder rolls, seated side bends, gentle spinal rotations, ankle circles, heel lifts, and seated cat-cow with hands on thighs. Finish with a supported forward fold over the thighs if the neck and spine tolerate it, or remain upright and practice longer exhales. This sequence is short enough to fit into a work break but complete enough to reduce stiffness and recalibrate posture.
How to cue chair yoga for caregivers
Caregivers should use simple, non-judgmental language and offer only one instruction at a time. Phrases like “Place both feet on the floor,” “Soften your shoulders,” and “Breathe out slowly” are often more effective than dense anatomical explanations. Let the person know they can skip any movement that causes dizziness, pain, or fear. The best caregiver cueing model is calm, consistent, and respectful, similar in spirit to the clarity used in caregiver roadmaps that prioritize quality of life.
Safety tips for injuries, aging, and sensitive bodies
Use pain as a signal, not a challenge
Yoga should not create sharp pain, nerve symptoms, joint pinching, or lingering soreness that worsens after practice. Mild muscular effort and stretch sensation can be normal, but pain that changes movement patterns is a sign to stop and modify. If someone is healing from injury or has a chronic condition, coordination with a qualified clinician or physical therapist is wise, especially for spine, shoulder, hip, or knee issues. Safety is not about caution for its own sake; it is about preserving long-term practice capacity.
Common red flags to watch for
Watch for breath holding, facial tension, wobbling that does not improve, limb numbness, or asymmetrical loading. These often indicate that the pose is too intense or the current version is asking for too much stability. In aging bodies, also pay attention to osteoporosis considerations, blood pressure sensitivity, vestibular issues, and reduced floor tolerance. For a broader lens on stability and risk management, the same mindset used in rethinking security practices after incidents applies here: identify weak points early and adjust before a small issue becomes a big one.
Build “exit strategies” into every sequence
Every pose should have a simple way to come out. Teach students how to return to neutral, how to use the hands for support, and how to rest between shapes. In practice, this means planning transitions as carefully as the pose itself. For example, after a lunge, step back to tabletop or a chair rather than forcing a fast standing transition. Exit strategies reduce fear, especially for beginners and anyone with balance concerns.
Examples of smart modifications by goal
For flexibility without strain
If flexibility is the goal, add time and support rather than force. Longer holds with props often create better outcomes than aggressive depth, because the body can relax into a controlled range without protective tension. Use straps in hamstring stretches, blocks in standing folds, and bolsters in hip opening poses. This approach is especially helpful for beginners modifications because it teaches patience and body awareness at the same time.
For strength and posture
To build strength, choose smaller ranges with clean alignment and controlled breathing. Chair-assisted chair-squat patterns, wall push patterns, supported planks, and standing balance holds can all improve functional strength without demanding advanced flexibility. In posture work, look for neutral spine, stacked rib cage and pelvis, and well-supported scapular movement rather than exaggerated “military” posture. Good strength work in yoga is quiet and stable, not flashy.
For stress and sleep
For nervous system downshift, reduce load and use props generously. Supported child’s pose, legs-up-the-wall, reclined butterfly, and seated breathing with a chair back are all effective because they lower effort while lengthening the exhale. Keep transitions slow and repetitive so the body receives a clear message of safety. People who need sleep support often respond better to these gentler versions than to intense flow classes late in the evening.
How to teach or practice modifications safely
Start with consent and context
Before teaching or self-practicing, ask what matters most: pain reduction, confidence, mobility, balance, or time efficiency. That answer determines the version of the pose and the pacing of the session. If you are leading another person, especially a caregiver or family member, invite them to tell you where they feel effort and what feels uncertain. Consent-based teaching improves trust and helps avoid surprises.
Use one change at a time
When a pose feels too hard, change only one variable first: reduce depth, add a prop, or change the body position. Making several changes at once can obscure what actually helped and what may still be causing discomfort. One-variable adjustments make it easier to learn the pose and easier to troubleshoot future classes. This is a practical way to refine yoga pose modifications instead of turning them into guesswork.
Repeat, notice, then refine
Practice the modified version several times and observe whether the breath smooths out, the jaw softens, and the body feels more organized. If yes, you have probably found a sustainable version. If not, continue reducing the load or choose an entirely different shape with the same benefit. That reflective cycle is what makes yoga a progressive practice rather than a random sequence of poses.
Comparison table: choosing the right modification strategy
| Scenario | Best modification | Helpful props | Why it works | Watch for |
|---|---|---|---|---|
| Wrist pain in downward dog | Wall dog or hands on chair | Chair, wall, blocks | Removes wrist load while keeping shoulder and hamstring work | Shoulder shrugging, breath holding |
| Tight hamstrings in forward fold | Bend knees and elevate hands | Blocks, chair | Keeps spine long and reduces strain on the back of the legs | Rounding from the low back |
| Balance concerns in tree pose | Toes on floor or wall support | Wall, chair | Builds confidence and reduces fall risk | Locking standing knee |
| Knee sensitivity in child’s pose | Wide-knee supported version | Bolster, blanket | Reduces compression and allows the torso to rest | Pinching or numbness at the knees |
| Low-back fatigue in bridge | Supported bridge with block under sacrum | Block, blanket | Restores the spine without repetitive lifting | Arching ribs or neck strain |
| Limited floor mobility | Chair yoga sequence | Sturdy chair | Maintains mobility and breath work without floor transfers | Slumping or unstable chair placement |
Frequently asked questions
How do I know if a yoga modification is enough?
A modification is enough when you can breathe steadily, keep your face relaxed, and exit the pose without bracing or pain. It should feel challenging in a manageable way, not like a test. If the body is fighting to survive the shape, it is too much. In that case, reduce the range, add support, or switch to a different pose that targets the same goal.
Are props for modification only for beginners?
No. Props are useful for beginners, experienced practitioners, older adults, athletes, and anyone working with pain or asymmetry. Advanced students often use props to refine alignment or to make a pose more therapeutic rather than more intense. In good yoga teaching, props are a sign of precision, not weakness.
Can I modify every yoga pose?
Almost every pose can be modified, but some shapes may need to be replaced rather than reduced if they are not appropriate for a person’s current condition. For example, a deep backbend might be better exchanged for a supported chest opener, and a challenging balance may be better replaced by a wall-supported version. The aim is to preserve the benefit, not force the exact shape.
What are the safest yoga pose modifications for beginners?
The safest beginner modifications usually include bent knees, shorter stances, wall support, chair support, blocks under the hands, and slower transitions. These adjustments reduce the need for flexibility and balance while building body awareness. Beginners often do best when they can feel stable enough to focus on breath and simple alignment cues.
How do I choose between a chair, wall, or block?
Choose the prop that solves the main problem with the least complexity. Use a wall for balance and posture feedback, a chair for floor access or load reduction, and blocks when the floor is simply too far away. If one prop is not enough, combine two, such as wall plus chair or blocks plus blanket. The best choice is the one that makes the pose safer and more teachable.
Putting it all together: a reliable modification mindset
Safe yoga modifications come from a simple philosophy: reduce strain, preserve the purpose, and keep the practice breathable. When you evaluate a pose by its demand rather than its appearance, you can adapt intelligently for injuries, aging bodies, fatigue, and limited mobility. You also make yoga more consistent, because the practice becomes something you can actually return to on difficult days. That is why the best modification plans are not improvisations; they are repeatable systems that grow with the person.
If you are building a home practice, start small and stack success. Choose one standing pose, one seated pose, one floor pose, and one restorative pose that you can modify confidently with props. If you are teaching someone else, offer calm cues, avoid jargon, and invite feedback after every round. For additional practical support ideas, explore our guides on ergonomic upgrades, real-time support tools, and clear documentation for better engagement—all of which reinforce the same principle: the right support makes good outcomes more repeatable.
Most importantly, remember that the most effective yoga pose modifications are the ones that let you keep practicing tomorrow. That is the real marker of success. A pose that respects your joints, your breath, and your energy is not an easier version of yoga; it is yoga done wisely.
Related Reading
- Best Ergonomic Upgrades for People Managing Smart Homes From a Desk - Helpful ideas for reducing strain during long seated work sessions.
- Automate Your Commute Study Routine with Android Auto Shortcuts - A practical lens on making healthy routines easier to repeat.
- Remote Assistance Tools: How to Deliver Real-Time Troubleshooting Customers Trust - A useful model for calm, clear guidance under pressure.
- Treating Atopic Dermatitis in Skin of Color: A Caregiver’s Roadmap to Biologics and Quality‑of‑Life Benefits - Caregiver-focused communication that translates well to wellness support.
- Rethinking Security Practices: Lessons from Recent Data Breaches - A risk-management mindset that applies surprisingly well to safe movement planning.
Related Topics
Maya Bennett
Senior Yoga Content Editor
Senior editor and content strategist. Writing about technology, design, and the future of digital media. Follow along for deep dives into the industry's moving parts.
Up Next
More stories handpicked for you
Build Flexibility: Progressive Yoga Sequences for Hips and Hamstrings

The Power of Connection: Creating Supportive Communities in Wellness

Chair Yoga for Seniors: Safe, Seated Sequences for Mobility and Balance

Yoga for Back Pain: Gentle Poses and Daily Routines That Help

Dancehall & Dharma: The Healing Power of Movement Inspired by Sean Paul
From Our Network
Trending stories across our publication group

Extend Your Mat’s Life: Simple Cleaning and Maintenance Routines for Every Material

Natural Rubber Mats: Performance, Allergy Considerations, and Care Tips

Maximizing Your Fitness Space: How to Transform a Room into a Yoga Sanctuary

Shift-Smart Yoga for Hospitality Professionals: 10-Minute Reset Routines for Late Shifts, Revenue Teams and Kitchen Crews
Sound Bath or Sports Massage? Choosing the Right Recovery Tool for Busy, Social Professionals